Manage Your Broadcast
Once you have an approved message template, you can use it to send messages to your audience using the broadcast feature in our dashboard. You can watch our video tutorial below to learn how to broadcast a template message.
How to Broadcast a Template Message
- Go to the Broadcast page by clicking from the left side navigation, and click + Create Broadcast on the top right of the page.

- Enter the name of the broadcast you want to make, the maximum number of characters in the broadcast name is 250 characters

- Select the business number that will be used to send broadcast messages, only numbers with connected status can be used to send broadcast messages. On the side of the number there is an indicator to see whether the cart and catalog are activated on that number.

- Next, select the message template that you want to use. Only message templates with active status can be used. If the selected message contains variables, you need to fill in all of these variables. You can fill it in with contact data for certain variables. You can also fill in the fallback used.

- After that, select the recipient of the broadcast message you created. You can choose via labels that have been created or by uploading an excel file. To use the file in more detail Documentation

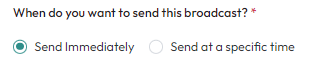
- The last thing is to select the time to send the broadcast message. You can choose between being sent right now or being sent at a certain time
- Click Send to send or click Save as draft to save as a draft at the top right.

Example Case for Creating a CSV File
Let’s take a look at how to make a CSV file for an example content below: Assume this message template has a "visit a website" CTA button with a dynamic URL. In the CSV file, you have to make a column for the variable URL.
To create the CSV from example above, make columns with the following names in excel: The example content above has two variables in the body content. In the excel, make columns body1_type and body1_text to input the content for variable {{ 1 }} and columns body2_type and body3_text to input the content for variable {{ 2 }}. There will be more body#_type and body#_text columns following the number of variables in the body section.
After making the column names, fill in the contents for each column like the example below:
Make sure you fill all the contents correctly to ensure the message is sent successfully. Once you are done filling the contents, save your excel document as a CSV and your CSV is ready for upload.
Error on CSV Upload
If your CSV upload returns a warning, you can’t proceed to send a broadcast. Let’s take a look at the warnings and what you can do to solve the problem.
| Warning Message | Solution |
|---|---|
| Your CSV file size must not exceed 10 MB | Compress your CSV file size and reupload |
| Your CSV file is incompatible with the chosen template message, please check your parameters. | Make sure the column fields and their names are correct and match with the variables in the selected message template. |
View Your Broadcast
After you send a broadcast, your broadcast is listed on the Broadcast page. Here are the things you can see or do on the Broadcast page:
Broadcast Status
After a broadcast message has been submitted, the status will show In progress. Once the broadcast has been sent to all audiences, the status will be changed to Sent.
Broadcast Details
Broadcast details allow you to see the contents of the messages you have broadcasted and the analytics of the number of messages sent, read, and failed to send.
To view a broadcast detail, choose the broadcast that you want to see the details, and click the Details button on the right column.
You can find the information on a broadcast message under the "Broadcast details" title. On the right column, you’ll see a broadcast report that shows the status of the broadcasted messages. Here’s what the status means:
| Delivered | The message is sent but has not been opened by the recipient yet or the recipient might have read the message, but has the read receipt turned off. |
| Read | The recipient has read the message. |
| Failed | The message was not sent to a recipient. In this case, the following may be the case:
|
Delete Broadcast
If you want to delete a submitted broadcast, select the broadcast you want to delete and click the "Delete" button on the right column.